How to tune your hydrofoil
We use shims of various thickness to get to our recommended angle of incidence (relative to the front wing) as follows:
Your wingset comes tuned already with the correct shim (if needed). However you may choose to experiment and adjust the angle of incidence to your personal preference.
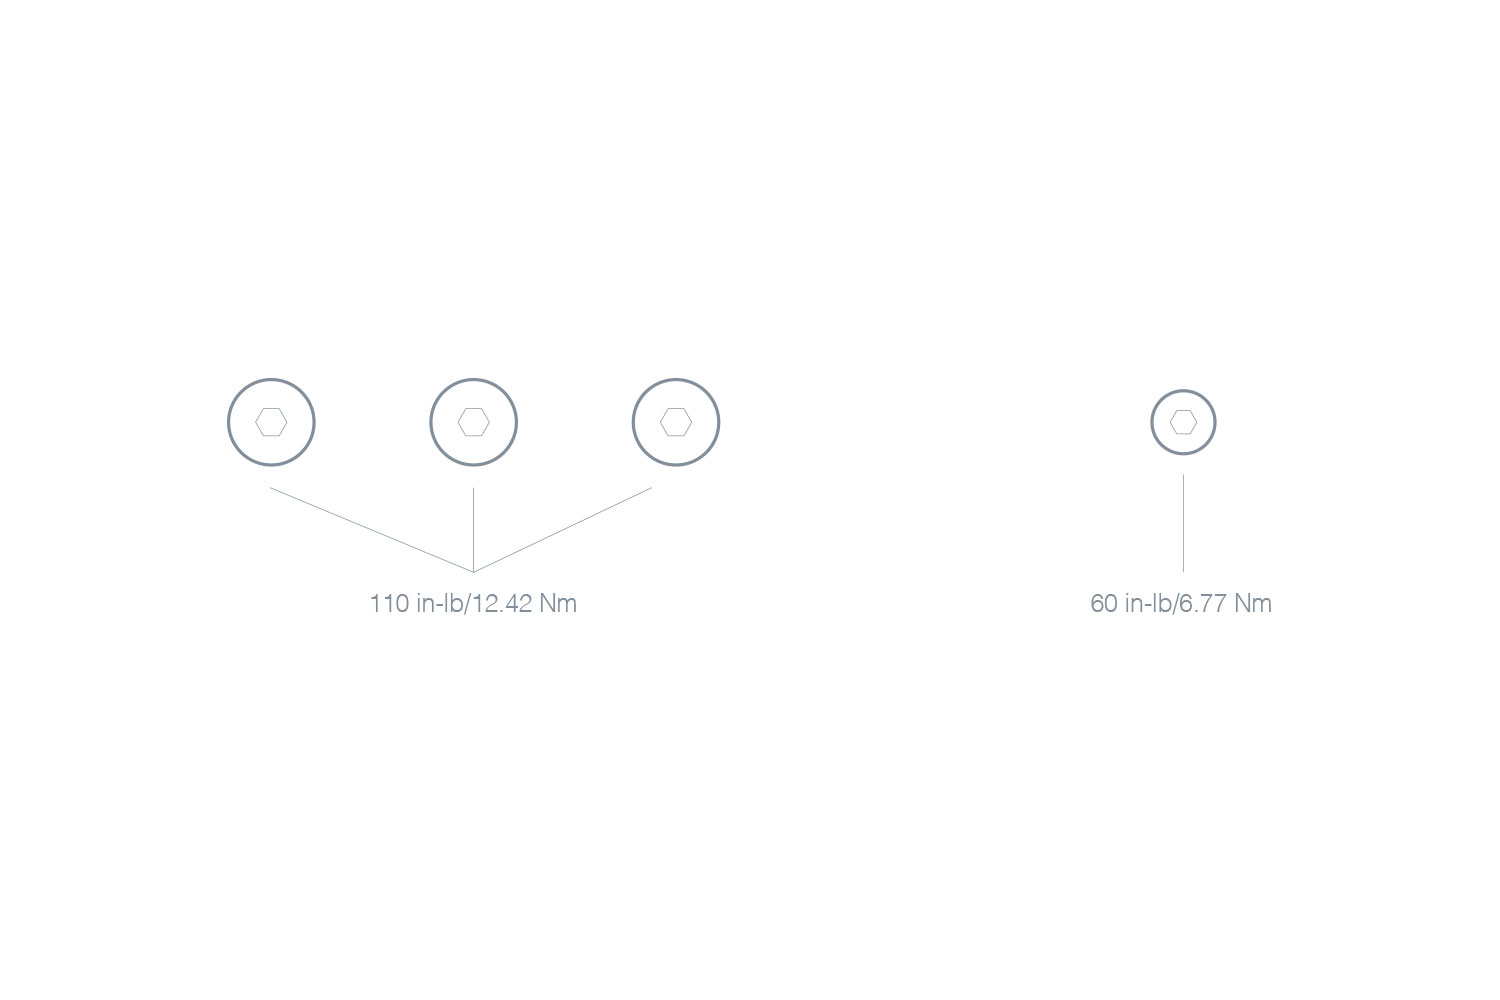
Please tighten your wingset mounting screws to the following specification. It is important to not over-tighten them. Big screws are 110 in-lb/12.42 Nm and the small rear screw is 60 in-lb/6.77 Nm.
Hardware Specification
Should you lose or wish to replace your original hardware:
Top screws to attach board to Tuttle head: Phillips Flat Head Screws. 1/4″-20 Thread Size, or M6 Thread size if you are taking delivery from Europe. (length depends on your board’s thickness).
Bottom large screws: Hex Drive Flat Head Screws. 1/4″-20 Thread Size, 2″ long.
Bottom small screw: Hex Drive Flat Head Screw. 10-24 Thread Size, 1-1/8″ long.
The correct size Stainless Steel L-key for the large screw is 5/32″ Size
The correct size Stainless Steel L-key for the small screw is 1/8″ Size
All of the above hardware can be ordered from McMaster-Carr
For clients that wish to convert their Tuttle head to metric from standard or vice versa, hardware, please contact orders@mikeslab.com
Ventilation
Ventilation on the strut can happen for a variety of reasons. Most often ventilation occurs due to impurities that can build up on the leading edge, or scratches that can result from hitting things in the water. Water temperature and sea state also play an important role in the separation of laminar flow on the strut.
It is very important to keep the strut very clean, especially the leading edge. Do not touch it with dirty or greasy hands. You can clean the mast periodically with alcohol or household glass cleaner.
If you have persistent ventilation problems, or some surface defects and leading edge scratches as a result of hitting something in the water, please use the following procedure to bring back the leading edge to original performance:
You should do this only if you feel absolutely confident, otherwise you may risk changing the profile of the leading edge. If in doubt please contact us
1. Examine and fill any scratches or impact pits created from hitting something in the water using two part epoxy. Make sure to use only a tiny amount, just enough to fill, leaving very little to sand afterwards. Sand down the cured epoxy just in the repaired area with 600 grit until it is even. Only do a few strokes locally with 600 grit, as you can easily ruin the symmetry of the leading edge.
2. Start by wet sanding the leading edge with 1000 grit sand paper. Make sure your strokes are 45º alternating to the direction of the water flow.
3. Steadily work your way up to 1500, then 2000 grit. Be sure to change your water often so as not to contaminate the subsequent grit.
4. Rinse and dry off the strut. When dry use a 3M Trizact pad 3000 grit to buff the strut to a satin sheen.
5. Wipe down with alcohol or glass cleaner and you are ready to go.